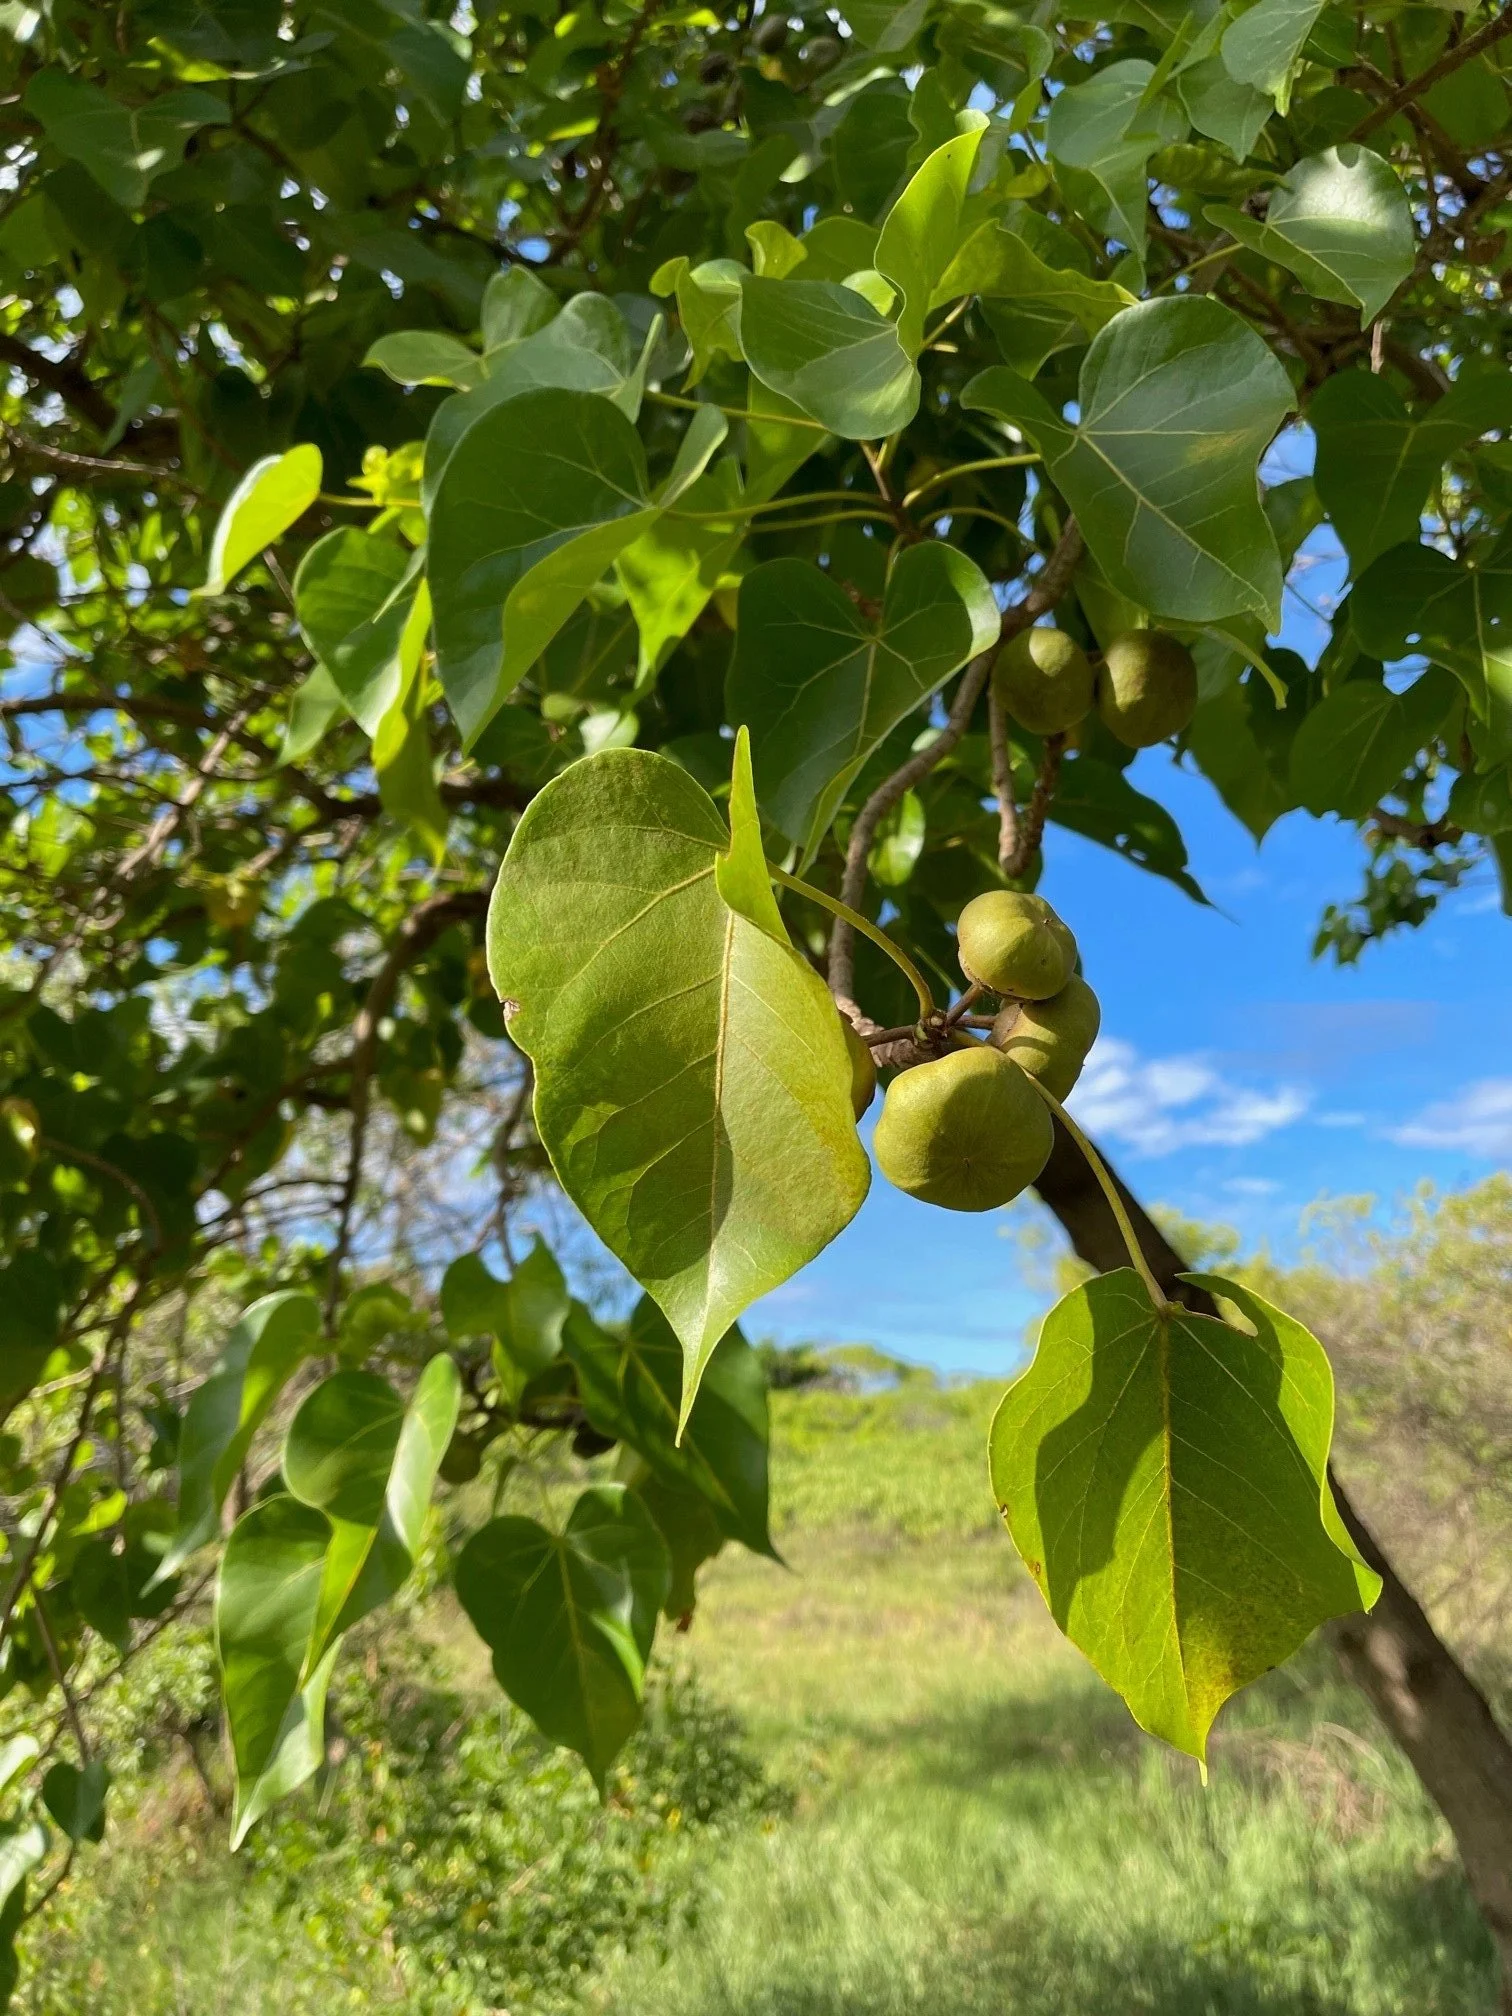

Effortless in its coloring and variety of uses, Milo was once a valued tree in Hawaii. The glossy heart shaped green leaves, its distinctive brown and green fruit, and the orange and yellow flowers easily distinguishes it from any surrounding flora. In the past, there were fields of these trees reserved for the sole use of the ali’i (chiefs). The trees grew to such extraordinary heights that the Hawaiians were able to make canoes from them. Milo is also used for bowls and platters. Unlike the more popular Koa wood, Milo does not have a resin that affects foods flavor or color, so it was much more ideal to eat from. The young leaves, flowers, and buds were considered edible, but it is not mentioned as a main food source. This could be because to the commoners, Milo would not have been a food source available to them or perhaps it was more of a backup food in case of famine. I can only speculate.
The mature trees offer a gorgeous wood that has streaks of red, yellow, and brown throughout it – weaving and teasing the colors help to enhance the art created from it. I deeply cherish my kapa implements made with Milo wood because of its beauty and strength. As more invasive species were introduced to the landscapes and the demand for Polynesian ki’i (wood carvings) grew, Milo trees were cut down until it became rare to spot one while journeying around the coastal areas of Maui. Sometimes we would go to pick the green milo fruits and find the whole tree cut down with only the largest part of the trucks taken. The wide branches lay in a circular pattern around the devastation, wasted wood, fruit, and fiber decaying.
Even though the heart wood is preferred , I still use the thicker Milo branches for my kapa tools. The weight is lighter so it is ideal for delicate fiber pieces or for keiki or kupuna to use (children or elderly). Its also still enough of a “hardwood” that it would last longer then the other lighter woods that I use for workshops. The remaining “unusable” wood can be used for natural dye or kindling. Nothing should be wasted.

Medicinally, it helps with headaches, infections, and constipation. The inner bark can be removed from large branches or from the trunk and processed into a rough cordage. This was not one of the preferred fibers as the quality could not compare to the other options the Hawaiian people had during that time (such as Hau). If the tree was meant to be harvested or if a storm blew it over, then each piece could be used for something to avoid waste.

Milo fruit freshly picked and cut showing the bright yellow color bursting forth.
Oh, the colors!
My favorite thing to do during a Natural Hawaii Dye Workshop is to bring a jar of freshly picked green Milo fruit to the class. When it is the time to work with the Milo, I pluck one from the water and make a tiny incision. And voila! out gushes a gorgeous, stunning, bright yellow dye. Simply beautiful.
Lets list the colors that can be obtained from this humble looking tree!
Yellow - To obtain just the plain yellow color simply pick the fruit, puncture it and when the color gushes forth, paint with it. Or if you want to use it for a dye, then remove the outer husk and then boil the husk right away. If you leave the fruit in the water to long then the color will shift into the orange and red.
Yellow, Orange, and Red - The green Milo nuts can produce shades of yellow, orange, and an orange-reddish color. To obtain all these colors from the same batch of fruit, simply harvest the fruit, submerge it in room temperature water and after 7-8 days, peel off the outer husk and boil the husk. The first 30 minutes will result in a yellow color, then in the next 30 minutes it will become orange, and 3o minutes after that, the color shifts into an orange-red. So, from one batch of Milo fruit and an hour and a half of boiling you can get 3 different colors. Note: Never use the inner seeds at all when dyeing with milo as it will change the resulting color and create more of a muddy brown effect. We normally throw the seeds into our gardens so it goes back to the ‘āina.
Green - Mixing the strong/fresh milo yellow color with the skin from the ʻukiʻuki berry will result in various shades of green. Playing with the ratio of blue and yellow will shift its color tone.
Purple/blue- Dilute the milo fruit of its yellow pigment by peeling off the outer husk, keeping the inside seeds and “meat” in tact. The outer skin can be placed to the side to be used for yellow dye. The inside portion should go back into the original bowl of water that the milo was soaking in for about 5 minutes. After its had time to absorb the water, then take the intact milo seeds and squeeze the slimy liquid into a porcelain bowl or plate. Mix the anther of the Hau flower and the milo slime together. The color will appear red but when your kapa or cloth dries it will shift its color into more of a purplish blue.
Orange- The milo wood can create a reddish orange color but it is not one I use often as it would require me to cut a milo tree.

From left to right: Milo slime with Hau anther creates the purple/blue, milo yellow and ʻukiʻuki blue creates the green, and freshly picked milo creates the yellow.

Fresh milo fruit
Fresh Milo will not produce the orange or reddish-orange hues unless it has been boiled and then set to the side to age. The only color it will produce at its fresher stage will be yellow.
To preserve the Milo fruit to use for dye bathes or workshops, simply pick the fruit and immediately place it in water. Do not place it in the fridge or freezer. Cold water is unnecessary. Just adding it into room temperature water and putting it in the shade or away from direct sunlight will allow this amazing fruit to last for up to 2 weeks.
If you are trying to preserve more of its slime then the color, then you can drain the yellow by making a small puncture to the outer skin, squeeze the fruit until as much of the pigment comes out as possible, then wash it in water until there is less yellow showing. Set it to the side under shade and the fruit will dry out green and remain that way for another 2+ weeks. To reactivate it, remove the husk and cook it on medium heat. Do not include the seeds as this will cause a brown tinge to appear in the slime.

Milo being preserved in a coconut bowl and water.
Freshness Stages When Immersed in Water:
1-3 days will still allow gushing yellow to appear upon puncturing the outer
husk. TIP: The first day is always the best day but if you have to pre-pick it,
then doing so the day before will still work. Spring and summer may affect
how “juicy” your Milo fruit will be so make sure to check your favorite Milo
tree before any workshop dates.
7-8 days the Milo fruit will no longer have yellow oozing from any cuts and
at this stage the skin is softer and easier to cut into and you can obtain the
3 color shifts mentioned before with a nice boil on the stove for 1 1/2
hours.
14+ days will result in the Milo fruit being so soft that you can crush it with
your fingers or with in the palms of your hand. This stage will still allow for
a dye however, it is extremely important to use a strainer and clean up the
dye bathe before dipping any cloth into it. At this point you will no longer
have large chunks of plant matter to deal with but small granules that will
stick to whatever fabric you choose to dye with.

The fresher the fruit, the harder it will be to cut of the outer skin. It is important that you are aware of your finger and hand placement whenever you use a knife.
Tip: if yellow is the color you wish to obtain then save yourself the hassle and simply leave the fruit soaking for around 10 days and then cut into it. The skin will be softer and much easier to work with. This is one of the situations where the Hawaiian word “Waiwai” which means rich or wealthy, makes sense. Wai means water in Hawaiian and when you have a lot of water (i.e., Waiwai) then you would be considered wealthy. Hawaiian people lacked sharp metal knifes to peel and cut the fruits with. But with patience and some water, it can cut down on the amount of work significantly. Work smarter, not harder!
Milo slime?
Yes, you read that right. Milo produces a very intense slime, and we take full advantage of it! There are 3 ways in which we can use the slimy by product.
1. Slime riddled water - The Milo fruit will begin to excrete/release slime the longer it soaks in the bucket or bowl you place them in. If you want to avoid too much yellow going into your slime and thereby contaminating your slime, then be sure to check each Milo fruit for puncture wounds before placing them into the water. If there is damage on the fruit, then soak them in with a different batch. This slime can be used as your water for any earth pigment dyes. Instead of using regular water, use this slimy water. It will function as a protective coating and a glue so your dirt/dust will not simply be brushed off when dry.
2. Slimy Yellow - The water from the soaked fruit that contains some yellow pigment can be used as the color shifter for the Hau anther. Little bit of yellow, lots of slime, add in some Hau anther and we got a new color!
3. Protective Slime - Milo slime can be smeared on to kapa (tapa) fibers to create a rain barrier and assist in preventing any color bleeds. Once the milo dye has been completed and the bathe is exhausted (color is used up) then remove all the Milo husk, do a quick rinse in clean water, then spread it onto the bottom of a recycled baking pan. The pan or bowl must be deep. The Milo husk should cover the whole bottom but should not exceed more than half of the height. The rest of the pan will need to have fresh water poured all the way to the top. Let it sit for 2-3 days, constantly check on it, and keep it away from any sunlight. Add more water when needed. Eventually, you will notice a very thick white and slightly yellow smile building on the very top of the water. This is the slime you want. There should not be to much yellow color still left which makes this ideal for kapa pieces. Skim off the very top of the water until you have collected most if not all of it. Then simply smear it gently on your kapa piece or whatever else you would want to use this technique for.

Milo fruit after 2 weeks being soaked. We can easily smash it with our hands, and you can still see the yellow pigment waiting to be used.
Storage
Once the Milo has been used for dye or paint it cannot be re-used. If you would like to use the slime in some way, then it is possible to place it in a freezer or fridge however, the dye itself will not work as well ever again.

Did you know that the Milo tree wood can also produce a dye bathe? Since we will not be cutting any Milo trees down, we do not encourage too much curiosity on this one.
From works of art to cordage to natural dyes to medicinal properties, the Milo tree is certainly an important Hawaiian plant worth planting, protecting, and utilizing. Check out the green Milo fruits but remember to be safe while foraging and always ALWAYS ask for permission if it is on someone else’s property. Stay safe and keep up the curiosity.
Aloha,
Kapa Curious